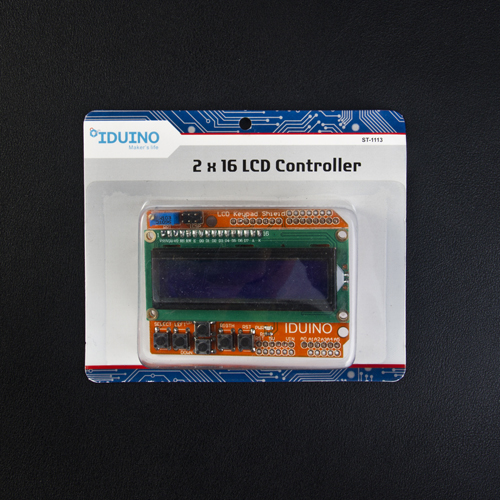
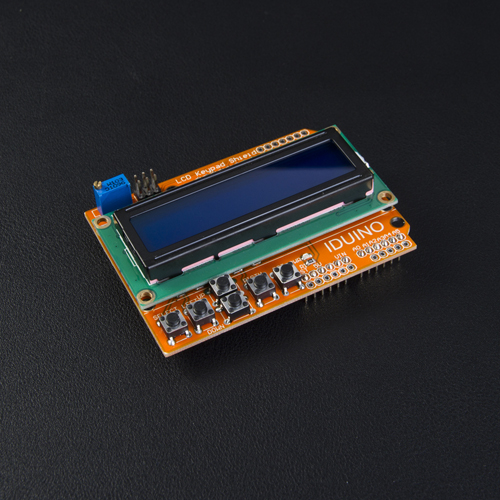
2×16 LCD Controller
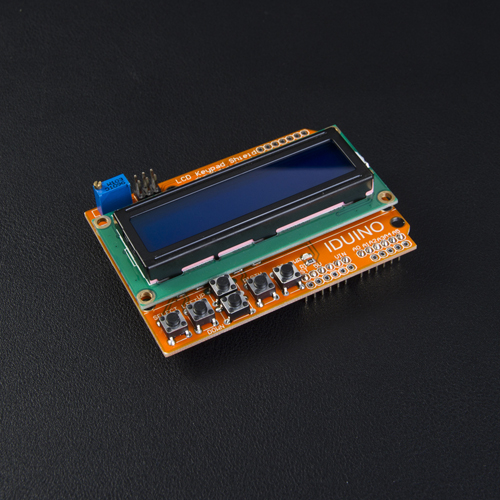
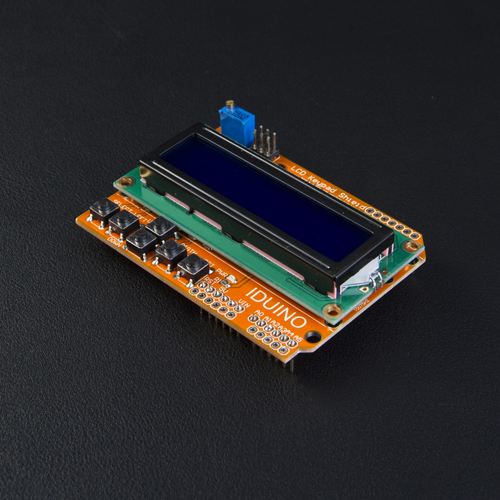
Come with a built -in 16 character by 2 line LCD display with adjustable backlight, this six push button keypad allows you to create a user friendly interface for your project. The keypad consists of up, down,left,right, select and also a reset button. Perfect to use as a selection menu.
Specifiction:
- 16 Characters ×2 lines(32 Characters)
- Contrast adjust knob
- LED Backlight
- 4 Bit Arduino LCD Libiary
- Dimensions:80×58×20mm
1. Introductions
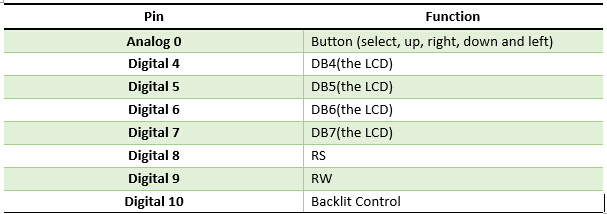
The LCD Keypad shield is developed for Arduino compatible boards, to provide a user-friendly interface that allows users to go through the menu, make selections etc. It consists of a 1602 white character blue backlight LCD. The keypad consists of 5 keys — select, up, right, down and left. To save the digital IO pins, the keypad interface uses only one ADC channel. The key value is read through a 5 stage voltage divider.
Specifications:
- Blue Backlight with white words
- uses 4 Bit Arduino LCD Library
- Left, Right, Up, Down and Select buttons
- Screen contrast adjustment
- Arduino Reset button
2 Pin Instruction
3. Example
Here is a example to test the button function of this module.
//Sample using LiquidCrystal library #include/******************************************************* This program will test the LCD panel and the buttons Mark Bramwell, July 2010 ********************************************************/ // select the pins used on the LCD panel LiquidCrystal lcd(8, 9, 4, 5, 6, 7); // define some values used by the panel and buttons int lcd_key = 0; int adc_key_in = 0; #define btnRIGHT 0 #define btnUP 1 #define btnDOWN 2 #define btnLEFT 3 #define btnSELECT 4 #define btnNONE 5 // read the buttons int read_LCD_buttons() { adc_key_in = analogRead(0); // read the value from the sensor // my buttons when read are centered at these valies: 0, 144, 329, 504, 741 // we add approx 50 to those values and check to see if we are close if (adc_key_in > 1000) return btnNONE; // We make this the 1st option for speed reasons since it will be the most likely result // For V1.1 us this threshold if (adc_key_in < 50) return btnRIGHT; if (adc_key_in < 250) return btnUP; if (adc_key_in < 450) return btnDOWN; if (adc_key_in < 650) return btnLEFT; if (adc_key_in < 850) return btnSELECT; // For V1.0 comment the other threshold and use the one below: /* if (adc_key_in < 50) return btnRIGHT; if (adc_key_in < 195) return btnUP; if (adc_key_in < 380) return btnDOWN; if (adc_key_in < 555) return btnLEFT; if (adc_key_in < 790) return btnSELECT; */ return btnNONE; // when all others fail, return this... } void setup() { lcd.begin(16, 2); // start the library lcd.setCursor(0,0); lcd.print("Push the buttons"); // print a simple message } void loop() { lcd.setCursor(9,1); // move cursor to second line "1" and 9 spaces over lcd.print(millis()/1000); // display seconds elapsed since power-up lcd.setCursor(0,1); // move to the begining of the second line lcd_key = read_LCD_buttons(); // read the buttons switch (lcd_key) // depending on which button was pushed, we perform an action { case btnRIGHT: { lcd.print("RIGHT "); break; } case btnLEFT: { lcd.print("LEFT "); break; } case btnUP: { lcd.print("UP "); break; } case btnDOWN: { lcd.print("DOWN "); break; } case btnSELECT: { lcd.print("SELECT"); break; } case btnNONE: { lcd.print("NONE "); break; } } }
